How to change the styling of your search UI
Note that this guide is most useful for integrations using our Search UI Widgets (https://docs.search.io/developer-documentation/fundamentals/search-ui-widgets )
If you are using our Search UI Widgets integration and you find you want to change the styling of the components in the UI then we have a number of options available to you. We will run through each of them in this guide.
By default, our widgets will look for base styling on your site and try and incorporate it into the widgets. For example, we will look for styles applied to <body> and <html>.
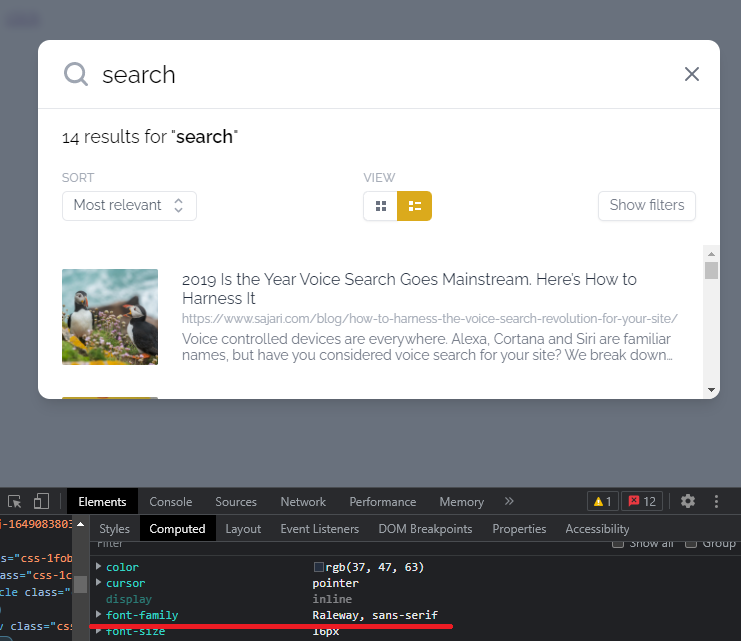
In our example below we have font-family: 'Raleway', sans-serif; applied to the document’s <body> element.
When we trigger the overlay (note that we are using the overlay integration for this example!) we can see that the widget has incorporated the font-family into the design:
However, you will find that the rest of the styles in the search UI are fixed. Here are a few ways to override the styles:
1. Override the default styles completely
If you simply want to get rid of all styles that are applied by Search.io to the search UI, then you can add one line of code to your JSON:
"disableDefaultStyles": true,This single line of code will completely remove all the default styles that come with the Search UI Widgets. The line can be added to all available widgets and is a great way to start your styling out from a blank slate:
https://codesandbox.io/embed/zealous-poincare-t1zsq4?fontsize=14&hidenavigation=1&theme=dark
2. Apply custom changes to single elements
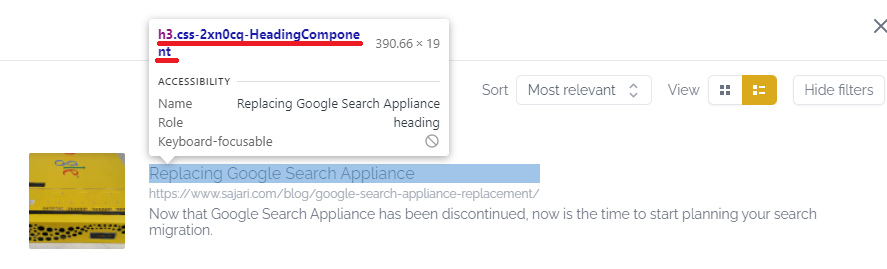
Instead of overriding all default styling, you might want to just target certain elements for styling purposes. The CSS classes you see on elements in the UI are dynamic and aren’t reliable to target for styling:
Therefore, you can add your own CSS classes to elements to style. For this example we will be changing font-weight of the the <h3> element you see above. First we need to decide on a class name, we are just going to be calling this .search-header. To do so we can add the following to our JSON:
"customClassNames": {
  "results": {
    "heading": "search-heading"
  }
},customClassNamesis a property we can add to all Search UI Widgets and lets you add custom class names to elements defined by their grouping. To see a full list of elements you can target see this page: https://react.docs.search.io/styling#available-classnames .
Now when we inspect the element we can see .search-headinghas been applied as a custom class name:

All that’s left is to add the style to your stylesheet. Here we have simply added the following:
h3.search-heading {
      font-weight: 700;
}Note that we have to add the h3 declaration to the selector to increase the CSS specificity and override the existing style.
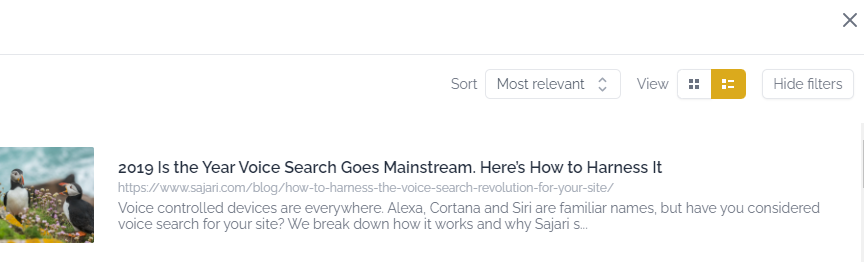
There we go, the font is now much bolder!
3. Keep the default styling when styles conflict
Sometimes you may find that your website is actually overriding the default styles of the Search UI Widgets. This is common for some CMS platforms, such as Wordpress, where themes have CSS declarations with a high enough specificity to override the default Search UI Widget styles.
To solve this problem we can add the !important property to all default CSS declarations that come with the Search UI Widgets.
To do this simple add the following line of code to your JSON block:
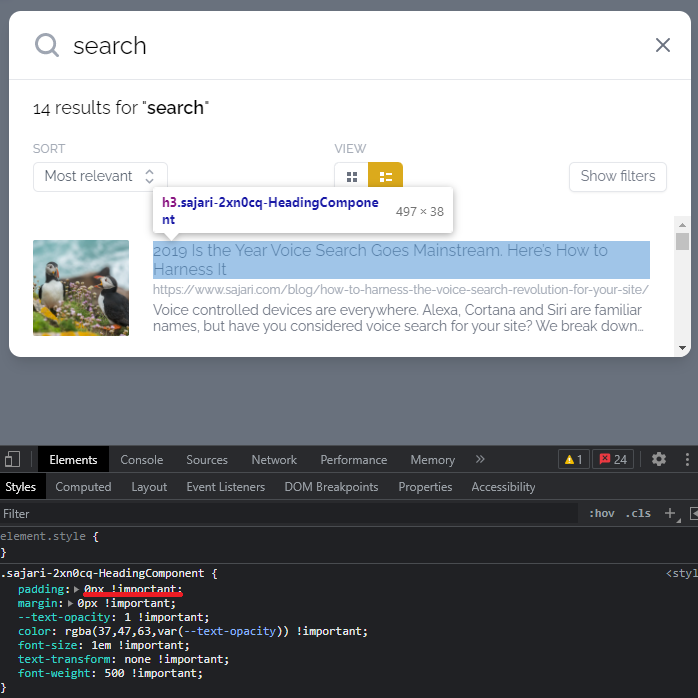
"importantStyles": true,Now when you inspect the UI elements you can see that the !important property has been added to all CSS declarations:
That’s it! We’ve learned how we can harness the power CSS to customise our search interface 🥳.